

You can clone the code from here: https://github.com/mirano-galijasevic/OpenAPINet5
CREATING THE PROJECT
Create the ASP.Net Core project, then select the API project, and make sure the ASP.NET Core 5.0 is selected, and also that the checkbox "Enable OpenAPI support".
After the project is created, the main changes are in the Startup.cs file, where Swagger was added to generate the Open API specification. We can see that in lines 32-35 the Swagger middleware is registered, which is used to both generate the specification in Open API format and also to serve the pages that help to browse and test the API.
We can see in lines 44-45, it has been added to the code where it first checks if we are in the development environment, and only then it sets the Swagger UI, which makes a lot of sense.

Figure 1.1: Open API support in the code
The NuGet package have been added automatically for us:

Figure 1.2: Swashbuckle Nuget package
Let us now run the project and test to see what we've got...so head on to the project in the Solution Explorer, right click on it, select "Open in Terminal", this will open the terminal either in PowerShell or command prompt depending on your current settings, and then run the project using the dotnet run command:
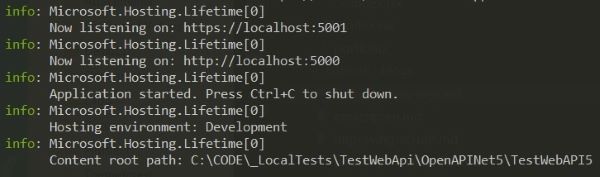
Figure 1.3: Developer terminal
This will compile and run the Web API using the project settings, which are usually set to run the project using the localhost and port 5001. After the project runs, let's open the browser at this location: https://localhost:5001/swagger
You should see the page that shows the specification of the API we are currently using:
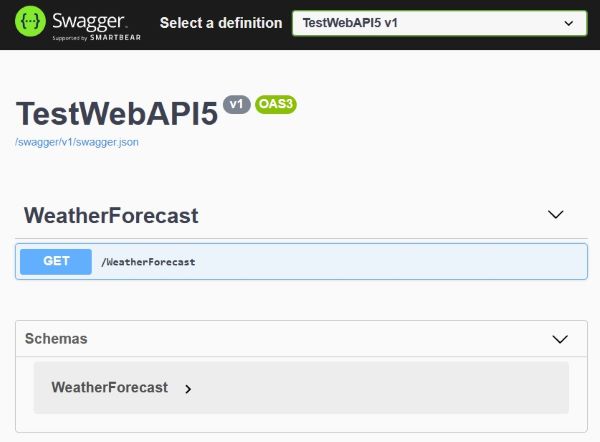
Figure 1.4: Open API specification
As we can see, the specification shows the WeatherForecast method that was created by the template we were using, and it also shows that we are using the Open API Standard 3. If you want to read more about it, then go to this location: https://swagger.io/specification/
Of course, you can click on the GET method, then see it in more details, test it from within this page, etc., which is something we had even before, when it was possible to add the Swagger to the API.
So, why is this change important then? First of all, we have this all generated for us if we check the box "Enable Open API support" at the time of creating the project, no additional work needed. Secondly, us older guys remember the painful times when SOAP services were ruling this planet. That was the best technology at that time, but really painful to work with. At that moment the WWW consortium suggested using the WSDL - Web Service Defition Language, that was hard to read by humans but represented the full specification of the service, with methods, parameters etc.
Something like this did not exist in the REST world, but now with the introduction of the Open API specification we can close the gap and generate the client code that can help us speed up the process of using the REST APIs, and decreasing the time needed to creating such systems.
Let us now create such client. I will create the Blazor WASM stand-alone application for this, as I believe it is by far the most advanced type of the project we have at this moment, but you can use other types of web applications if you find them more familiar.
There are several ways to generate the client code: you can inspect the Web API and generate it, you can download the swagger.json file that has a json representation of the API (see the link to the swagger.json file right below the name of the API in figure 1.4 above? You can click on it and download the file, that can be used to generate the client code), then you can also generate it from the client side by using the downloaded swagger.json or by connection to the endpoint of the running API service. I will use the very last option, generating the client code from the client application utilizing the endpoint of the API project, that has to be running at that moment, as this seems to be the most logical and easiest approach.
Create a new project and add it to our existing solution...please select the Blazor App template, name it "BlazorClient" or whatever you wish, and then make sure you select the Blazor WebAssemblyApp and do not select ASP.Net Core Hosted option, as we want to create a stand-alone web assembly project, not the one hosted in the ASP.Net Core.
Now we should have the client application. You can not compile it, set the Blazor project as a startup project, and then run it with F5. You should get a default page as created by the template, then click "Fetch Data" on the side bar menu, and sure enough you would get a list of Weather Forecast objects.
Close the page now....where does this comes from? Well, it is hard-coded locally, which you can see when you go to the wwwroot and then sample-data folder, you can see the weather.json file, which contains the data that is displayed in the table. We really want to connect to the API and pull the data from there, so please delete the file and the folder sample-data all together.
Now go to Pages\FetchData.razor and open it. Here we can see, in the code section down below, the class for WeatherForecast and also how the data was pulled from that local weather.json file in the OnInitialized method of the page.
Let us now use the ability to generate the client code automatically...right client on the client project, Add -> Service Reference....this will open a new window, click on Add in the Service References section, select the OpenAPI (you will see two options: OpenAPI and gRPC), and finally you will see the window where we select the URL and then use the address as the above. Please remember, the API project is still running, and if you have not changed any defaults then this will be the correct address. If you did, then go to the Swagger UI page we have shown earlier in Figure 1.4, click on the swagger.json link below the Project's name, and you will get the correct address that you need to use here. So the service reference needs the json.file in order to create the client code, which is only logical.
After that, we click the Finish button, and now we can see the created client in this window:
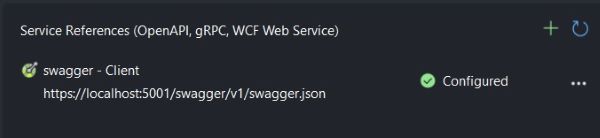
Figure 1.5: Created Service Reference
Use the three dots on the right side, as you can see here you can remove the reference, refresh it in case the API changes and new methods are added, but then you can also "View generated code", so let's click on that.
Please investigate the generated code a bit, and also note that it resides in the obj folder, meaning it is being created in runtime. You should, of course, not change it manually. Please also note the name of the class that was created, it should be swaggerClient or someting, as we'll need it later.
Let us now go back to the FetchData razor page, and use our generated code to fetch the data from the API. Go to the OnInitialized method and add the code as in the following figure:
private ICollection <WeatherForecast> forecasts;
protected override async Task OnInitializedAsync()
{
    var client = new swaggerClient("https://localhost:5001", Http);
    forecasts = await client.WeatherForecastAsync();
}
There are several changes here:
- We deleted the WeatherForecast class, because the generated client code already has a serialized WeatherForecast class that was pulled from the server side. So just one of those things we get for free.
- We then use the class swaggerClient that is in the generated code to set up the base address where our API is located, and also the HttpClient. Needless to say, we should get the address from the configuration file in a real world application. Also, where does the Http comes from? Please look at the top of the page, the HttpClient is injected as Http in this page.
- After that we make the call to return the data. You will probably need to change the type of the forecast variable to ICollection.
So, all in all not too many changes, and we need not to deal with setting up the http client and worry about packaging up the request and then deserializing the response.
Before testing this, we need to make sure the API will allow this call, so please go ahead to the API, stop it in the terminal (use CTRL+C), and add the CORS configuration in Startup.cs as the last line in ConfigureServices method:
cors.AddPolicy("CorsAll", options => options.AllowAnyOrigin().AllowAnyMethod().AllowAnyHeader()));
app.UseCors("CorsAll");
And then, we add this policy in the first line of the Configure method:
app.UseCors("CorsAll");
This is not a good practice as it opens the CORS for any client and any method and any header, so in a real production situations we should open the exact client's address that will be making the requests to the API, and we should also be as restrictive as possible by allowing the least number of verbs and headers that will make the API work, but since this is a demo application that has the topic something totally different, we can just use it.
Let us now compile and run the API and then head on and run the client application, that should now display the weather forecasts properly.
CONCLUSION
This is a nice functionality that we now get out of the box without too much work involved from our side, that bridges the gap we had and gets us closer to the nice functionality that WSDL provided earlier.
We now have a much nicer experience not having to deal with the http client and taking care of the requests and responses, since we now just use the client generated code and call methods on the generated classes as we would with any other class, which provides for the overall experience begin as if everything is located locally. All other work involved with communicating over the wire is abstracted from us and we do not need to deal with it, so we can better focus on the business challenges we are trying to solve.
